In the world of modern connectivity, coaxial cables play a crucial role in transmitting audio, video, and data signals. Whether it’s for your home entertainment system, internet connection, or security cameras, a damaged coaxial cable can disrupt your daily activities. That’s where coaxial cable repair kits come to the rescue. These kits are designed to provide quick and efficient solutions for fixing common coaxial cable issues, allowing you to restore your signal and get back to enjoying seamless connectivity.
Understanding Coaxial Cables
Before delving into the repair kits, it’s essential to have a basic understanding of coaxial cables. Coaxial cables consist of a central conductor, surrounded by an insulating layer, a metallic shield, and an outer protective jacket. The design of coaxial cables allows for high – frequency signal transmission with minimal interference. However, due to their widespread use and exposure to various environmental factors, they are prone to damage.
Common types of coaxial cables include RG6, which is widely used for cable TV and high – speed internet connections, and RG59, often used for lower – bandwidth applications such as CCTV systems.
Common Coaxial Cable Problems
- Cable Cuts or Breaks: Physical damage to the cable, such as cuts or breaks, can occur due to accidental pulling, chewing by pets, or wear and tear over time. When the cable is cut, the signal path is interrupted, resulting in a loss of signal.
- Loose Connectors: Over time, the connectors at the ends of the coaxial cable can become loose. This can be caused by frequent 插拔,vibration, or improper installation. Loose connectors can lead to signal loss, interference, or a weak connection.
- Damaged Connectors: The connectors on coaxial cables can get damaged due to corrosion, physical impact, or poor quality. A damaged connector may not make a proper connection with the device or the other end of the cable, causing signal issues.
- Signal Interference: In some cases, the coaxial cable may be affected by external interference from sources such as power lines, radio transmitters, or other electrical devices. This can result in a degraded signal quality, with symptoms like snow on a TV screen or slow internet speeds.
Components of a Coaxial Cable Repair Kit
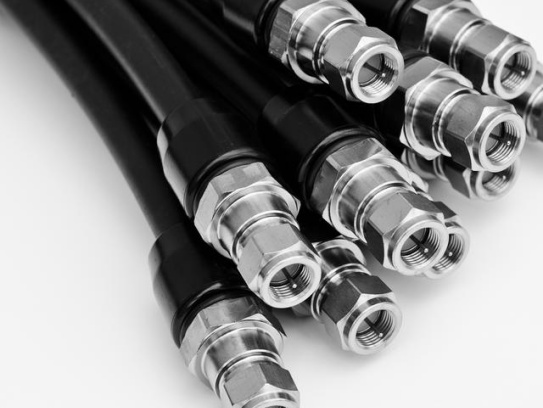
- Connectors: Coaxial cable repair kits typically come with a variety of connectors, such as F – type connectors. These connectors are used to re – establish the connection at the end of the cable. For example, if the existing F – type connector is damaged or loose, you can replace it with a new one from the kit. There are also different types of F – type connectors, including compression connectors, which provide a more secure and reliable connection compared to other types.
- Cable Strippers: A cable stripper is an essential tool in a coaxial cable repair kit. It is used to carefully remove the outer jacket, the insulating layer, and expose the central conductor and the shield of the coaxial cable. A good cable stripper is designed to make clean cuts without damaging the inner components of the cable. Some cable strippers are adjustable, allowing you to work with different types of coaxial cables, such as RG6, RG59, and RG11.
- Crimping Tools: If your kit includes compression connectors, a crimping tool is necessary. The crimping tool is used to compress the connector onto the cable, ensuring a tight and secure connection. When using a crimping tool, you place the stripped cable into the connector, insert the connector and cable assembly into the crimping tool, and then squeeze the handles of the tool. The tool applies the right amount of pressure to crimp the connector onto the cable, creating a strong bond.
- Joining Barrels: In cases where you need to splice two coaxial cables together, joining barrels are used. These are cylindrical connectors that have threads or compression fittings on both ends. You insert the stripped ends of the two cables into the joining barrel, and then secure them in place. Joining barrels are useful when you have a long cable run and need to connect two shorter cables to reach the desired location.
- Testing Equipment: Some high – end coaxial cable repair kits may include basic testing equipment, such as a continuity tester. A continuity tester is used to check if there is an unbroken electrical connection through the cable. By testing the cable before and after making repairs, you can ensure that the repair has been successful and that the signal can flow through the cable without interruption.
Types of Coaxial Cable Repair Kits
- Basic Repair Kits: These kits are suitable for simple repairs, such as replacing a damaged connector or fixing a loose connection. They usually include a few F – type connectors, a basic cable stripper, and sometimes a small screwdriver for tightening the connectors. Basic repair kits are ideal for homeowners who only need to perform occasional minor repairs on their coaxial cables.
- 3 – in – 1 Repair Kits: A 3 – in – 1 coaxial cable repair kit typically includes a cable crimper, a cable stripper, and a set of connectors. These kits are more comprehensive and are suitable for a wider range of repairs. The cable crimper allows you to use compression connectors, which offer a more secure connection. The adjustable cable stripper can handle different cable types, making it a versatile tool for various coaxial cable repair jobs.
- Professional – Grade Repair Kits: Professional – grade repair kits are designed for technicians who work with coaxial cables on a regular basis. These kits often include high – quality tools, such as precision – made crimping tools, heavy – duty cable strippers, and a large assortment of connectors. They may also come with additional features like ergonomic designs for comfortable handling during long – term use, and some may even include advanced testing equipment to ensure the highest quality of repairs.
How to Use a Coaxial Cable Repair Kit
- Identify the Problem: First, carefully inspect the coaxial cable to determine the nature of the problem. Look for visible cuts, breaks, or loose connectors. If you suspect signal interference, you may need to use a signal strength meter or other diagnostic tools (if available in your kit) to pinpoint the source of the problem.
- Prepare the Cable: If you need to replace a connector, use the cable stripper to carefully remove the outer jacket of the cable, usually about 1 – 1.5 inches from the end. Then, remove the insulating layer around the central conductor, exposing about 0.25 – 0.5 inches of the conductor. Be careful not to damage the shield or the central conductor during this process.
- Attach the Connector: If you are using a compression connector, insert the stripped end of the cable into the connector. Make sure the central conductor is fully inserted into the center of the connector. Then, place the connector and cable assembly into the crimping tool and squeeze the handles firmly to crimp the connector onto the cable. If you are using a different type of connector, follow the specific installation instructions provided with the kit.
- Test the Connection: After attaching the connector, use a continuity tester (if available in your kit) to check if there is a proper connection through the cable. If you are dealing with a signal – related issue, connect the cable to the appropriate device (such as a TV or a modem) and test the signal. If the signal is still not working properly, double – check your connections and repeat the repair process if necessary.
Choosing the Right Coaxial Cable Repair Kit
- Type of Repairs Needed: Consider the types of problems you are likely to encounter. If you only expect to deal with minor connector issues, a basic repair kit may be sufficient. However, if you anticipate more complex repairs, such as splicing cables or working with different cable types, a 3 – in – 1 or professional – grade kit would be a better choice.
- Quality of Tools: Look for kits that have high – quality tools. A well – made cable stripper will make clean cuts, and a reliable crimping tool will ensure a secure connection. Check reviews or product specifications to get an idea of the durability and performance of the tools in the kit.
- Compatibility: Ensure that the connectors and tools in the kit are compatible with the types of coaxial cables you commonly work with. For example, if you mainly deal with RG6 cables, make sure the kit has connectors and tools that are suitable for RG6.
- Budget: Coaxial cable repair kits are available at different price points. Set a budget based on your needs and the frequency of use. While it may be tempting to go for the cheapest option, investing in a higher – quality kit can save you time and frustration in the long run, especially if you need to perform repairs regularly.
Conclusion
Coaxial cable repair kits are invaluable tools for anyone who relies on coaxial cables for their audio, video, or data needs. By understanding the common problems that coaxial cables face, the components of a repair kit, and how to use them effectively, you can quickly fix cable issues and maintain a reliable connection. Whether you are a homeowner looking to make a quick fix or a professional technician working on complex installations, choosing the right coaxial cable repair kit is essential for ensuring the smooth operation of your coaxial – based systems. With the right kit in hand, you can be confident in your ability to handle any coaxial cable repair job efficiently and effectively.