Best

Micro Coaxial Cable factory

How to Test Coaxial Cable for Signal Integrity

Coaxial cables are the unsung heroes of many critical systems, from home TV setups and broadband networks to security cameras and industrial communication systems. These cables transmit high-frequency signals with minimal loss, but over time, factors like physical damage, wear and tear, or poor installations can degrade signal integrity. A coaxial cable with compromised signal integrity leads to frustrating issues: blurry TV images, laggy internet, dropped security camera feeds, or even complete signal loss.

If you’re experiencing such problems, testing your coaxial cable for signal integrity isn’t just a good idea—it’s essential. In this guide, we’ll walk you through everything you need to know to test coaxial cable signal integrity effectively, from pre-test checks to advanced troubleshooting. Whether you’re a DIY enthusiast or a professional technician, this step-by-step approach will help you identify issues and restore optimal performance.

Why Signal Integrity Matters for Coaxial Cables?

Signal integrity refers to a cable’s ability to transmit signals without distortion, loss, or interference. For coaxial cables, which carry high-frequency signals (like TV, internet, or radio waves), even minor issues can disrupt performance.

  • Common consequences of poor signal integrity: Pixelated TV screens, slow internet speeds, dropped VoIP calls, or failed security camera feeds.
  • Root causes: Physical damage (cuts, kinks), loose connectors, water ingress, impedance mismatches, or electromagnetic interference (EMI).

Testing helps pinpoint these issues before they escalate, saving time and money on unnecessary replacements.

Pre-Test Preparation: What You Need to Know

Before diving into testing, take these steps to set yourself up for success:

1. Identify Your Coaxial Cable Type

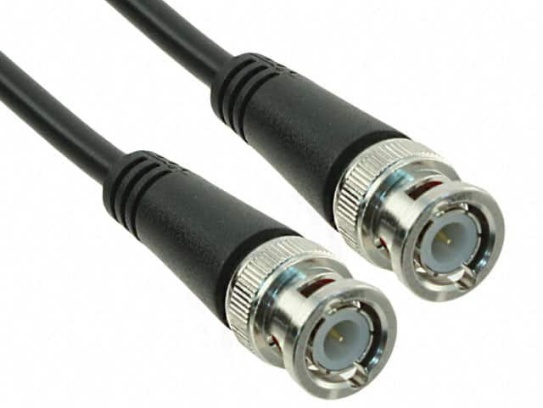
Coaxial cables come in various types, each designed for specific applications. The most common are:

  • RG-6: Used for satellite TV, cable TV, and high-speed internet (better signal retention over long distances).
  • RG-59: Often used for short-distance setups like CCTV cameras (more signal loss than RG-6).
  • RG-11: Ideal for long-haul installations (e.g., commercial buildings) due to low loss.

Knowing your cable type (check the label or documentation) helps you choose the right testing tools and interpret results accurately.

2. Document the Cable’s Use Case

Note where the cable is installed: Is it for a home theater system, a 4K TV antenna, a broadband modem, or a security camera? Different applications have different signal strength requirements. For example, a 4K TV signal needs higher bandwidth than a standard-definition feed, so testing thresholds will vary.

Essential Tools for Coaxial Cable Signal Integrity Testing

Having the right tools simplifies testing and ensures accurate results. Here’s what you’ll need:

1. Multimeter

A basic digital multimeter (DMM) is crucial for checking continuity and detecting short circuits. It measures electrical resistance, helping you confirm if the cable’s conductors are intact.

2. Coaxial Cable Tester

A dedicated coaxial cable tester (e.g., Klein Tools VDV501-851 or Fluke Networks CableIQ) is designed to check signal continuity, identify breaks, and measure signal loss. Many models also test for impedance mismatches.

3. Signal Strength Meter (Field Strength Meter)

This tool measures the strength of the signal traveling through the cable, displayed in decibels (dB). For TV or internet, a weak signal (below -60 dB for most applications) indicates issues.

4. Spectrum Analyzer (Advanced)

Used to detect interference (e.g., electromagnetic interference from nearby power lines or radio frequency interference from wireless devices) that disrupts signal integrity.

5. Impedance Meter

Coaxial cables have specific impedance ratings (most common: 50Ω or 75Ω). An impedance mismatch (e.g., a 75Ω cable connected to a 50Ω device) causes signal reflections and loss.

6. Visual Inspection Tools

A flashlight and magnifying glass help spot physical damage: cracks in the outer jacket, bent connectors, or corrosion on F-connectors (the most common coaxial connectors).

Step-by-Step Guide to Testing Coaxial Cable Signal Integrity

Follow these steps to systematically test your coaxial cable:

Step 1: Visual Inspection

Start with the simplest check: look for physical damage.

  • Examine the entire length of the cable for cuts, kinks, or crushed sections—these can damage the inner conductor or shielding.
  • Check connectors for corrosion, bent pins, or loose fittings. Corrosion (green or white deposits) often indicates water damage, a major cause of signal loss.
  • Ensure connectors are properly crimped or screwed on. A loose connector creates resistance, weakening the signal.

Step 2: Continuity Test (Using a Multimeter)

A continuity test checks if the cable’s inner conductor is intact (no breaks). Here’s how:

  1. Turn off the power to the device connected to the cable (e.g., modem, TV).
  2. Disconnect the cable from both ends.
  3. Set your multimeter to the “continuity” or “ohms (Ω)” setting. Some multimeters beep when continuity is detected.
  4. Touch one probe to the inner conductor of one end of the cable.
  5. Touch the other probe to the inner conductor of the opposite end.
  • Result 1: The multimeter reads near 0Ω (or beeps), indicating good continuity.
  • Result 2: The multimeter reads “OL” (open line) or a high resistance, meaning there’s a break in the inner conductor.

Pro Tip: Repeat the test for the outer shielding (braid) to check for breaks in the shielding, which protects against interference.

Step 3: Signal Strength Test (Using a Signal Meter)

Signal strength directly impacts performance. Here’s how to measure it:

  1. Connect the signal meter to one end of the coaxial cable (the end usually connected to the device, like a TV or modem).
  2. Ensure the other end is connected to the signal source (e.g., antenna, cable outlet).
  3. Power on the signal source and the meter.
  4. Read the signal strength in dB.
  • For TV/cable: Ideal range is -5 dB to -50 dB. Signals below -60 dB often cause pixelation or loss.
  • For internet (DOCSIS 3.1 modems): Downstream signals should be between -10 dBmV and +10 dBmV; upstream between 35 dBmV and 51 dBmV.

Step 4: Interference Test (Using a Spectrum Analyzer)

Interference (EMI/RFI) can distort signals. To test:

  1. Connect the spectrum analyzer to the cable.
  2. Monitor the signal spectrum for unexpected spikes or noise.
  3. Common culprits: Nearby power cables, fluorescent lights, or wireless routers. Move the coaxial cable away from these sources and retest to see if interference decreases.

Step 5: Impedance Test (Using an Impedance Meter)

Impedance mismatch causes signal reflections, wasting signal strength. Test as follows:

  1. Disconnect the cable from all devices.
  2. Connect the impedance meter to one end of the cable.
  3. Read the impedance. It should match the cable’s rated impedance (e.g., 75Ω for TV cables, 50Ω for industrial use).
  • A mismatch (e.g., 75Ω cable reading 50Ω) indicates damage to the cable’s dielectric (the insulation between inner and outer conductors).

Common Signal Integrity Issues & How to Fix Them

1. Weak Signal

  • Causes: Loose connectors, cable damage, or a long cable run (signal degrades over distance).
  • Fixes: Tighten connectors; replace damaged sections; use a signal booster (amplifier) for long runs.

2. Interference

  • Causes: Proximity to EMI/RFI sources, damaged shielding.
  • Fixes: Relocate the cable; replace cables with damaged shielding; use shielded connectors.

3. Continuity Failure

  • Causes: A break in the inner conductor or shielding (often from kinks or excessive bending).
  • Fixes: Short breaks can sometimes be repaired with connectors, but replace severely damaged cables for reliability.

4. Impedance Mismatch

  • Causes: Manufacturing defects, physical damage to the dielectric.
  • Fixes: Replace the cable—mismatched impedance can’t be repaired.

Maintenance Tips to Preserve Signal Integrity

  • Avoid sharp bends: Coaxial cables should be bent with a radius at least 10x the cable diameter to prevent damage to the inner conductor or shielding.
  • Protect from moisture: Use weatherproof connectors for outdoor cables and seal exposed ends with tape or heat-shrink tubing.
  • 定期测试: Test cables every 6–12 months, especially in high-use setups (e.g., commercial TV systems, security networks).
  • Upgrade when needed: Older RG-59 cables (common in legacy systems) have higher signal loss than RG-6. Upgrade to RG-6 for HDTV, 4K, or high-speed internet.

Final Thoughts

Testing coaxial cable signal integrity doesn’t require advanced expertise—with the right tools and a systematic approach, you can identify issues and restore performance. Whether you’re troubleshooting a fuzzy TV screen or a spotty internet connection, regular testing ensures your coaxial cables deliver reliable, high-quality signals.

By following these steps, you’ll not only fix current problems but also prevent future disruptions, keeping your systems running smoothly.

More Micro Coaxial Cable related Products

High-Speed Data Micro-Coax

IntroductionIn today’s fast-paced digital world, reliable and high-speed data transmission is critical for industries ranging from telecommunications to aerospace. Enter ​High-Speed Data Micro-Coax—a cutting-edge miniature coaxial cable e.

More information
Micro-Coax for HD Video

OverviewMicro-Coax for HD Video is a cutting-edge coaxial cable engineered to deliver ​uncompromised high-definition video quality across professional and industrial applications. Designed for reliability, precision, and versatility,.

More information
KEL Micro Coaxial Cable

KEL’s Micro Coaxial Cable solutions are at the forefront of modern electronic connectivity, offering exceptional performance in high-speed data transmission, miniaturization, and reliability. These connectors are integral to various.

More information
RF Micro Coaxial Cable

Meta Description: Discover premium ​RF micro coaxial cables engineered for high-frequency signal transmission in compact devices. Explore specs, applications, and benefits for telecom, medical, and aerospace industries. ​.

More information
High-Temperature Resistant Micro-Coaxial Cable

IntroductionThe ​High-Temperature Resistant Micro-Coaxial Cable is a cutting-edge connectivity solution engineered to deliver exceptional performance in extreme thermal environments. Combining precision engineering with advanced mate.

More information
Flexible Micro-Coaxial Assemblies

Meta Description: Discover our premium Flexible Micro-Coaxial Assemblies—engineered for high-frequency signal integrity, durability, and versatility in aerospace, medical, telecom, and robotics applications. What Are Flexible .

More information
Micro Coaxial Cable
Micro Coaxial Cable

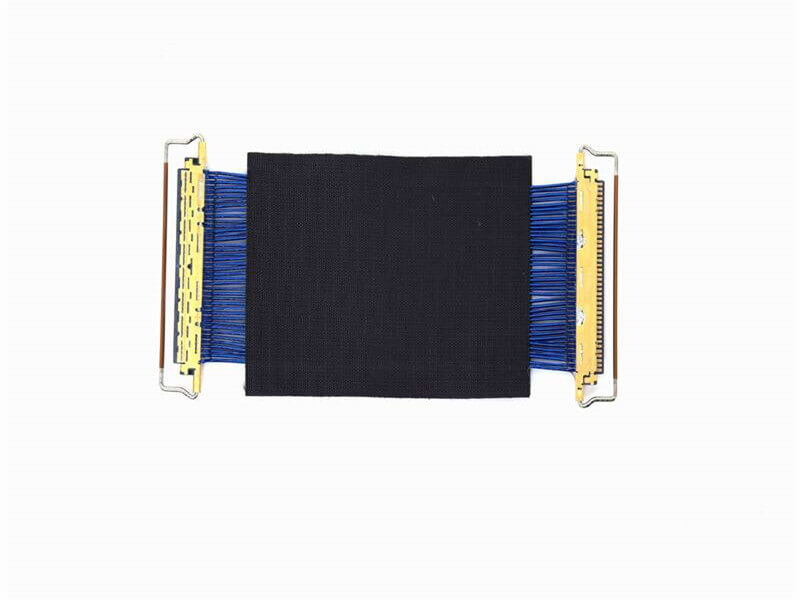
Micro Coaxial Cable: High-Quality Solutions for Precision Applications Micro coaxial cables are essential components in high-performance electronic applications, providing reliable signal transmission in compact and flexible designs. A.

More information
Precision Instrument Micro-Coax

H1: Precision Instrument Micro-Coax – Engineered for Critical Signal Integrity Meta Description: Discover Precision Instrument Micro-Coax: Miniature coaxial cable solution optimized for high-frequency signal transmissio.

More information
I-PEX Micro Coaxial Cable

Overview of I-PEX Micro Coaxial Cable Connectors I-PEX is a global leader in micro coaxial cable solutions, specializing in high-performance IPEX micro coax connectors and micro coaxial cable assemblies. These products are designed for.

More information
Industrial Micro-Coaxial Wiring

Meta Description: Discover the advanced features and benefits of Industrial Micro-Coaxial Wiring—engineered for precision, durability, and high-speed signal transmission in industrial environments. ​What is Industrial Micro-Co.

More information
LVDS Micro Coaxial Cable

In LVDS (Low Voltage Differential Signaling) display systems, Micro-coaxial Cable (also referred to as Micro Coax Cable) stands out as an optimal solution for high-resolution, high-reliability signal transmission. Designed to meet the str.

More information
Micro Coaxial Cable Service