Crimping Tools Specifically Designed for 0.81mm Micro-Coaxial Cables
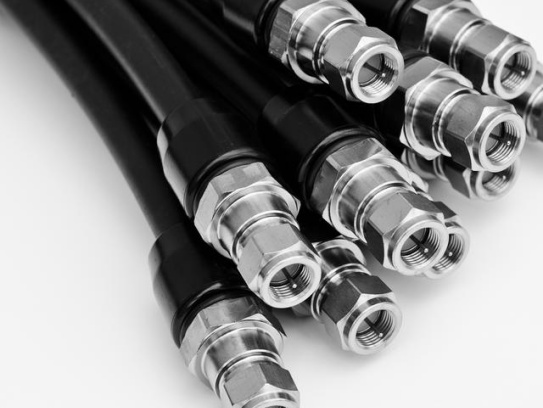
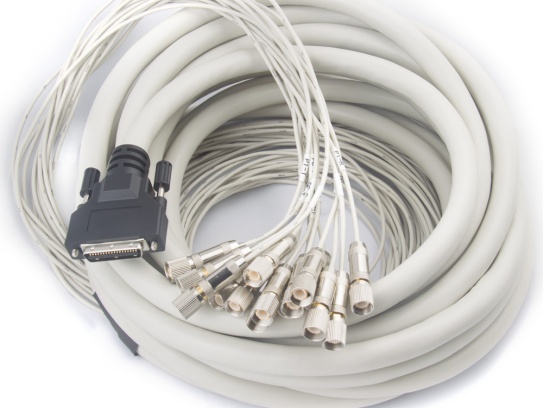
When working with delicate electronics or high-frequency signal applications, precision is non-negotiable. For 0.81mm micro-coaxial cables—commonly used in medical devices, aerospace systems, and telecommunications—a reliable crimping tool is essential to ensure secure connections and optimal performance. This guide explains why specialized crimping tools matter, how to choose the right one, and tips for achieving flawless crimps every time.
Why Use a Crimping Tool Designed for 0.81mm Micro-Coaxial Cables?
Micro-coaxial cables are incredibly thin, with 0.81mm diameters requiring ultra-precise crimping to avoid damaging the fragile inner conductor or insulation. Standard crimping tools lack the accuracy needed for these tiny connectors, which can lead to:
- Signal loss due to poor electrical contact.
- Cable fraying from improper pressure.
- Connection failures in high-vibration environments.
Dedicated crimping tools for 0.81mm cables are engineered with:
- Micro-scale dies to match the cable’s dimensions.
- Adjustable pressure settings to prevent over-crimping.
- Ergonomic designs for stability during intricate work.
How to Choose the Right Crimping Tool
Not all crimping tools are created equal. Follow these criteria to find a reliable option:
- Compatibility
Ensure the tool supports 0.81mm micro-coaxial connectors (e.g., Hirose U.FL, IPEX MHF). Check manufacturer specifications for exact measurements.
- Precision Engineering
Look for tools made from hardened steel with polished surfaces to reduce friction. A ratcheting mechanism ensures consistent crimps.
- Ease of Use
Features like color-coded dies, quick-release levers, and ergonomic grips simplify repetitive tasks.
- Durability
Industrial-grade materials (e.g., tungsten carbide) extend the tool’s lifespan, even with daily use.
- Certifications
Tools compliant with MIL-SPEC or ISO standards guarantee reliability for critical applications.
Step-by-Step Guide to Crimping 0.81mm Micro-Coaxial Cables
- Prepare the Cable
Strip the cable’s outer jacket carefully using a micro-stripping tool, exposing the inner conductor and shielding.
- Insert the Connector
Slide the connector onto the cable, aligning the conductor with the connector’s center pin.
- Position the Tool
Place the connector into the crimping tool’s die, ensuring it sits flush.
- Apply Pressure
Squeeze the tool’s handle smoothly until the ratchet releases, indicating a complete crimp.
- Inspect the Connection
Use a magnifying glass to check for even compression and no visible gaps.
Common Mistakes to Avoid
- Over-crimping: Excessive force can crush the connector, damaging the cable.
- Mismatched Dies: Using a die designed for larger cables creates loose connections.
- Skipping Testing: Always test crimped connections with a multimeter or network analyzer.
Top Recommended Crimping Tools
- I-PEX MHF Crimp Tool Kit
Built for 0.81mm cables, this kit includes interchangeable dies and a self-locking mechanism for error-free crimps.
- Hirose U.FL Precision Crimper
A favorite among engineers, it offers unmatched accuracy for high-frequency applications.
- Jonard Tools EC-456
Budget-friendly yet durable, ideal for hobbyists and small-scale projects.
Maintenance Tips for Longevity
- Clean dies regularly with isopropyl alcohol to remove debris.
- Lubricate moving parts monthly with silicone spray.
- Store tools in a dry, temperature-controlled environment.
FAQ: Your Questions Answered
Q: Can I use a generic crimper for 0.81mm cables?
A: No. Generic tools lack the precision needed, risking signal degradation or cable damage.
Q: How do I troubleshoot a faulty crimp?
A: Re-strip the cable, ensure proper connector alignment, and verify the tool’s die size.
Q: Are there automated crimping tools for mass production?
A: Yes. Brands like Molex and TE Connectivity offer benchtop crimpers for high-volume needs.