
Micro Coaxial Cable-Micro Coaxial Cable factory-(FRS)-FRS
Coaxial cable is a critical component in various systems, including television, internet, and security camera setups. Its ability to transmit high-frequency signals with minimal interference makes it a popular choice. However, to achieve optimal performance, proper installation is essential. This guide will walk you through the step-by-step process of installing coaxial cable, ensuring that you get the best possible signal quality.
Before diving into the installation process, it’s important to have a basic understanding of coaxial cable. A typical coaxial cable consists of a central conductor, an insulating layer, a metallic shield, and an outer jacket. The central conductor carries the signal, while the shield protects against electromagnetic interference (EMI) and radio frequency interference (RFI). The insulating layer keeps the conductor and shield separated, and the outer jacket provides physical protection.
There are different types of coaxial cables available, each designed for specific applications. For example, RG-6 is commonly used for cable TV, satellite TV, and high-speed internet, as it offers better signal quality and less loss than RG-59, which is often used for shorter runs in security camera systems. Choosing the right type of coaxial cable for your specific needs is the first step towards optimal performance.
**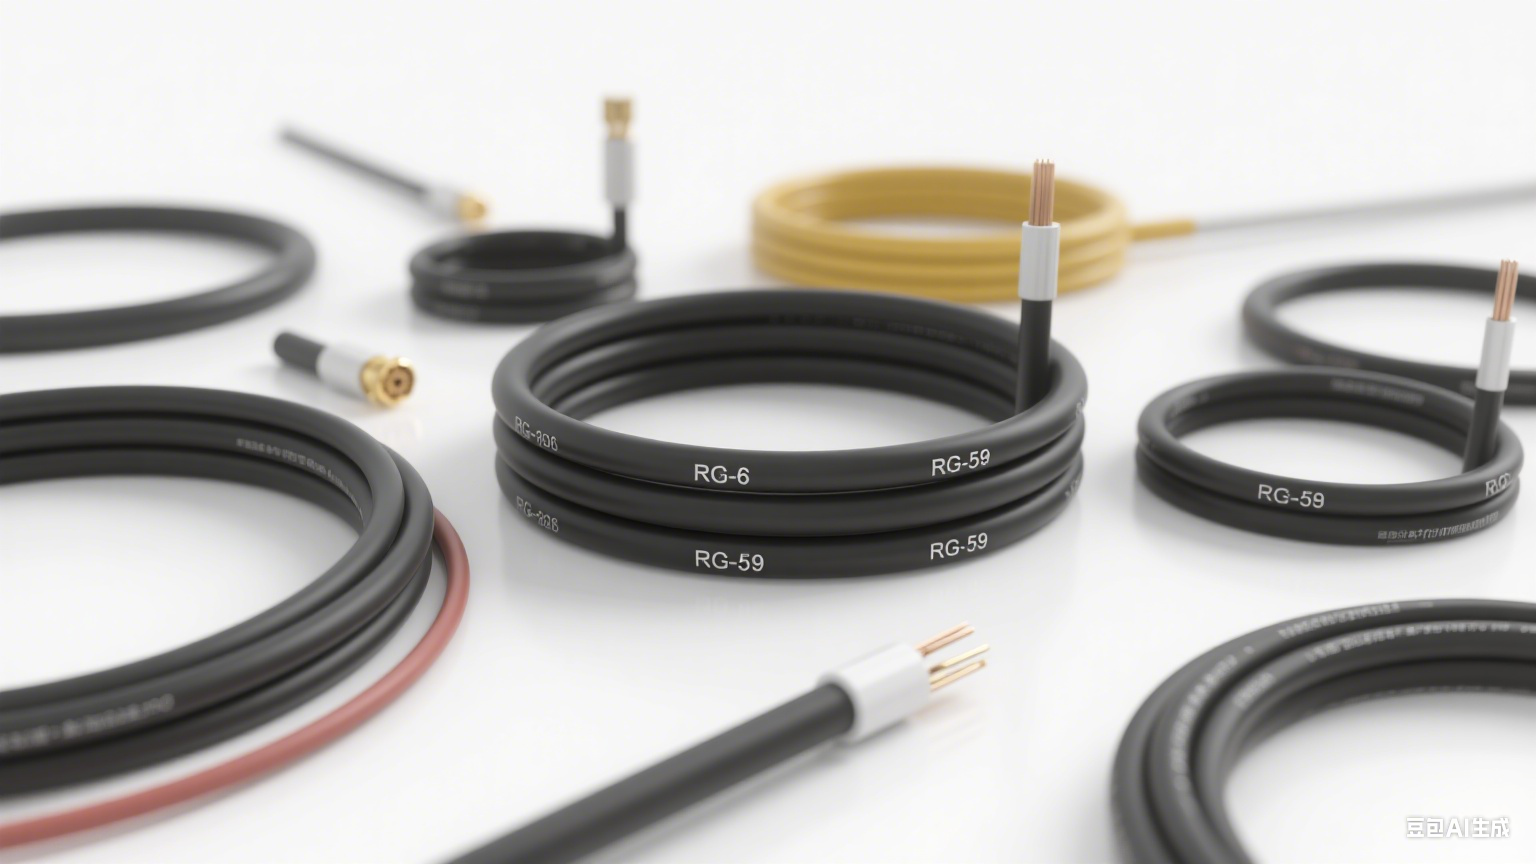
(Note: This is a placeholder for a 600*600px image showing different types of coaxial cables, such as RG-6 and RG-59, with labels)
To install coaxial cable, you’ll need the following tools and materials:
The first step in installing coaxial cable is to plan the route. You need to determine where the cable will start and end, and how it will be routed between these points. When planning the route, keep the following in mind:
Once you have planned the route, measure the length of cable needed. Add a few extra feet to account for any unexpected bends or adjustments. Use coaxial cable cutters to cut the cable to the desired length. Make sure the cut is clean and straight to ensure a good connection.
Using a coaxial cable stripper, carefully strip the outer jacket from the end of the cable. Most strippers have different settings for different cable types, so make sure to set it correctly for your coaxial cable. Strip off about 1/2 inch to 3/4 inch of the outer jacket, exposing the metallic shield.
Next, fold back the metallic shield to expose the insulating layer around the central conductor. Be careful not to damage the central conductor or the insulating layer. Then, strip off a small portion of the insulating layer from the end of the central conductor, leaving about 1/8 inch of the conductor exposed.
There are two common types of connectors for coaxial cable: compression connectors and crimp connectors. Compression connectors are generally considered to provide a better seal and better signal quality, but they require a compression tool. Crimp connectors are easier to install but may not provide as good a seal.
To attach a compression connector:
To attach a crimp connector:
After attaching the connector, inspect it to make sure it is securely attached and that there are no exposed wires.
Now it’s time to route the cable along the planned path. If running the cable through walls or ceilings, use a fish tape to pull the cable through. Be careful not to damage the cable during this process.
Once the cable is routed, secure it using cable clips or staples. Make sure the clips or staples are placed at regular intervals (every 12 to 18 inches) to prevent the cable from sagging or moving. Avoid over-tightening the clips or staples, as this can damage the cable.
After the cable is routed and secured, connect one end to the source device (such as a cable TV box, satellite receiver, or modem) and the other end to the destination device (such as a TV, router, or security camera). Use a screwdriver to tighten the connectors, making sure they are snug but not over-tightened.
Once all connections are made, use a cable tester to check the signal strength and continuity. A good signal should be strong and free from interference. If the signal is weak or there is interference, check the connections to make sure they are secure. You may also need to re-examine the cable route to see if it is too close to sources of interference.
– 定期检查电缆和连接器是否有损坏,如磨损的外套、松动的连接器等。及时更换损坏的部件,以确保最佳性能。
Proper installation of coaxial cable is essential for achieving optimal performance in your television, internet, or security camera system. By following the steps outlined in this guide, you can ensure that your coaxial cable is installed correctly, providing a strong, reliable signal.
When it comes to choosing high-quality coaxial cable for your installation, look no further than FRS Company. FRS is a leading manufacturer of coaxial cables, with a reputation for producing durable, high-performance products. Our coaxial cables are designed to minimize signal loss and resist interference, ensuring that you get the best possible performance from your system.
Whether you’re setting up a home entertainment system, a business network, or a security system, FRS coaxial cables are the perfect choice. We offer a wide range of coaxial cables, including RG-6 and RG-59, to meet your specific needs. Our cables are made from high-quality materials and undergo rigorous testing to ensure they meet the highest standards of quality and performance.
Trust FRS Company for all your coaxial cable needs. With our reliable products and commitment to customer satisfaction, you can be confident that your installation will be a success.
Our factory offers high-quality products at competitive prices
IntroductionThe High-Temperature Resistant Micro-Coaxial Cable is a cutting-edge connectivity solution engineered to deliver exceptional performance in extreme thermal environments. Combining precision engineering with advanced mate.
IntroductionIn today’s fast-paced digital world, reliable and high-speed data transmission is critical for industries ranging from telecommunications to aerospace. Enter High-Speed Data Micro-Coax—a cutting-edge miniature coaxial cable e.
Feel free to reach out to us for any inquiries or orders