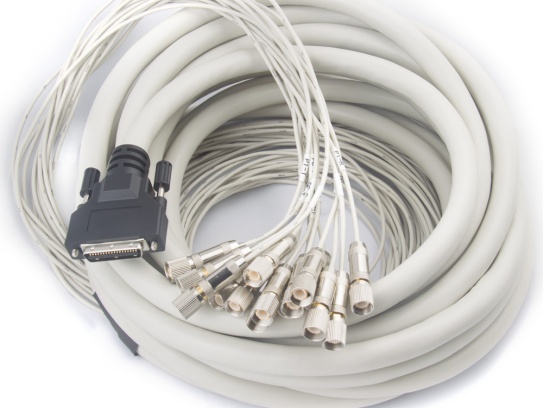
Micro coaxial cable assemblies are the unsung heroes inside countless devices – from medical equipment and aerospace systems to high-speed data centers and consumer electronics. Their tiny size belies their critical role in transmitting high-frequency signals reliably. But when multiple assemblies snake through tight spaces, improper labeling quickly leads to confusion, errors during installation or maintenance, costly troubleshooting, and even system failure.
Labeling them correctly isn’t just good practice; it’s essential for efficiency, safety, and long-term reliability. Here’s how to do it right:
1. Use Durable, Legible Labels:
- Material Matters: Standard paper labels won’t cut it. Use labels specifically designed for cables:
- Heat-Shrink Tubing Labels: These are the gold standard. Print your label directly onto special heat-shrink tubing (using a thermal transfer printer) or use pre-printed markers. When heated, they shrink tightly onto the cable, becoming permanent, abrasion-resistant, and often offering environmental protection (moisture, chemicals). Choose tubing with a diameter that shrinks down snugly on your specific micro coax.
- Self-Laminating Vinyl Labels: These have a clear protective “tail” that wraps over the printed area after application, shielding text from smudging, dirt, and minor abrasion. Ensure the adhesive is rated for cable use and the environment (e.g., UL 969 certified).
- Wrap-Around Labels: Vinyl labels designed to wrap fully around the cable. Choose high-quality vinyl with strong adhesive.
- Printing: Laser or thermal transfer printers produce the most durable, smudge-proof text. Avoid inkjet for permanent labels. Use high-contrast colors (black on white/yellow is common). Font size must be large enough to read easily but fit the small diameter.
- Legibility is Key: Text must be clear and easy to read at arm’s length, even in low light or cramped conditions. Avoid overly complex fonts.
2. Choose Meaningful Label Content:
- Be Clear and Consistent: Decide on a labeling scheme before you start and stick to it rigorously across all assemblies.
- Essential Information: Include at least:
- Source: Where the cable originates (e.g.,
J1, Power Supply A, Sensor Array Left).
- Destination: Where the cable terminates (e.g.,
P3, Main Board, Display Unit).
- Signal Type/Function (Optional but Recommended): Especially helpful if source/destination names aren’t perfectly descriptive (e.g.,
VIDEO, CLK 10MHz, RS-485, PWR +12V). Be cautious with voltage/current unless absolutely necessary for safety.
- Keep it Concise: Micro coax is small. Use abbreviations judiciously, but ensure they are standardized and understood by everyone who might work with the assembly (e.g.,
PSU_A -> MB_PWR).
- Unique Identifier: For complex systems, a simple unique number or code (
CAB-001, ASM-12A) referenced in documentation can be invaluable.
3. Apply Labels Correctly:
- Location, Location, Location: Place labels where they will be visible after installation. Common best practices:
- Near Connectors: Within 2-4 inches (50-100mm) of each connector hood. This is the most critical location for identification during connection/disconnection.
- At Regular Intervals (for longer runs): If the assembly is long and routed through panels or trays, add labels periodically (e.g., every 12-18 inches / 30-45cm) along its length for traceability.
- Avoid Stress Points: Don’t place labels directly on sharp bends or areas likely to experience high flexing or abrasion.
- Consistent Orientation: Apply labels so the text reads in the same direction relative to the cable run (e.g., always readable from left to right when viewing the cable path).
- Secure Application:
- Clean Surface: Wipe the cable jacket with isopropyl alcohol (IPA) before applying any label to ensure good adhesion. Let it dry completely.
- Smooth Application: Apply labels smoothly without wrinkles or air bubbles. For wrap-around or self-laminating labels, ensure they are wrapped tightly and evenly.
- Heat-Shrink Carefully: Apply heat evenly around the tubing using a heat gun (not a flame!) to avoid scorching. Shrink until snug and smooth.
4. Consider Color Coding (As a Supplement):
- Visual Aid: Using different colored cables, connectors, or heat-shrink labels can provide an instant visual cue about the cable’s function, voltage level, or subsystem.
- Standardize: Define a color code (e.g., red for power, blue for video, yellow for RF, green for ground/data) and document it thoroughly. Use it in addition to text labels, not as a replacement. Color perception can vary, and labels provide unambiguous information.
- Connector Boots/Strain Reliefs: Colored boots on micro coaxial connectors (like SMP, MMCX) are a common and effective way to add color coding right at the connection point.
Key Principles for Success:
- Durability: Labels must withstand the environment (temperature, chemicals, moisture, abrasion).
- Legibility: Text must be clear, permanent, and readable in situ.
- Clarity: Information must be unambiguous and consistent.
- Relevance: Label content must be useful for installation, testing, and maintenance.
- Accessibility: Labels must be placed where they can be seen when needed.
Pro Tip: For mission-critical or complex applications, refer to relevant industry standards for labeling practices (e.g., AS50881 for aerospace wiring, MIL-STD-130 for military item identification). These often provide detailed requirements for materials, content, and placement.
In Conclusion:
Properly labeling micro coaxial cable assemblies is a small investment of time that pays massive dividends in reduced errors, faster troubleshooting, improved maintenance, and overall system reliability. By using durable materials, printing clear and meaningful text, applying labels consistently in visible locations, and potentially supplementing with color, you ensure these vital signal pathways can be managed effectively throughout their lifecycle. Don’t let tiny cables cause big problems – label them right!