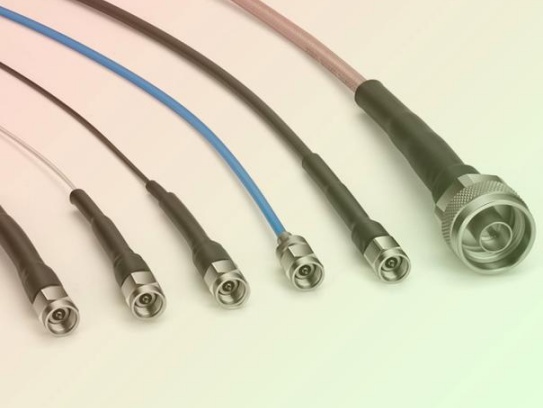
Micro-coaxial cables (micro-coax) – those thin, often less than 3mm diameter cables – are the unsung heroes powering critical video, RF, and data signals in drones, cameras, medical devices, and countless electronics. But their delicate nature means installation glitches are common. Before frustration sets in, use this troubleshooting guide to diagnose and fix the most frequent micro-coax problems.
Key Troubleshooting Principle: Work Methodically! Start with the simplest checks (connections, visual inspection) before diving into complex tests. Always power off devices before touching cables!
Problem 1: No Signal or Intermittent Signal Loss
- Symptoms: Blank screen, flickering image, missing data, unstable communication.
- Likely Culprits & Fixes:
- Faulty Connection Points: This is the most common issue.
- Check: Inspect both ends of the micro-coax cable visually (use magnification if needed). Ensure the connector center pin/pin field is intact, straight, and not pushed back into the housing. Verify the outer shield braid or connector housing makes solid metallic contact with its mating connector body (look for bent pins, damaged sockets, or contamination like solder flux, dirt, or oxidation). Push connectors together firmly to ensure they are fully seated.
- Fix: Clean contacts with electronics contact cleaner and a soft brush. Carefully re-bend bent connector pins using fine tweezers. Replace damaged connectors or cables.
- Cable Break (Internal or External):
- Check: Visually inspect the entire cable length for obvious kinks, crushing, cuts, or nicks in the jacket. Gently flex the cable along its length while monitoring the signal for intermittent reconnections.
- Fix: Replace the damaged cable section or the entire cable. Never splice micro-coax unless absolutely unavoidable and only using specialized micro-coax splice connectors. Splicing often ruins performance.
- Source/Device Failure:
- Check: Swap the micro-coax cable with a known-good cable of the same type. Test the source device and destination device independently if possible (e.g., does the camera work with a different monitor?).
- Fix: Identify and repair/replace the faulty source or end device.
Problem 2: Poor Video/Image Quality (Snow, Ghosting, Color Distortion)
- Symptoms: Fuzzy picture, colored speckles (“snow”), ghost images, washed-out colors, unstable picture sync.
- Likely Culprits & Fixes:
- Impedance Mismatch: Critical for video/RF signals!
- Check: Ensure all components (cable, connectors, adapters) match the required impedance (almost always 50 Ohms or sometimes 75 Ohms for video). Mismatched components cause signal reflections degrading the image.
- Fix: Replace mismatched cables/connectors/adapters with the correct impedance type.
- Damaged Shield/EM Interference:
- Check: Inspect connectors for damaged outer shells or braids not making good ground contact. Does interference worsen near motors, power supplies, Wi-Fi routers, or fluorescent lights? Try temporarily rerouting the micro-coax away from potential noise sources. Check cable routing against sharp chassis edges that could pinch/damage shielding.
- Fix: Improve shield grounding at connectors. Ensure the connector shell/shield is tightly secured to the device chassis ground. Re-route the cable away from noise sources using cable ties. Use shielded conduits if necessary. Replace severely shield-damaged cables.
- Signal Degradation (Length or Quality):
- Check: Are you exceeding the recommended maximum length for the specific micro-coax type/gauge and signal type? Using extremely cheap cable? Inspect for subtle internal damage (see Prob 1).
- Fix: Shorten the cable run if possible. Replace with a higher-quality or lower-loss micro-coax cable type suitable for the distance/frequency. Add a signal amplifier/repeater if length is unavoidable.
Problem 3: Connector Won’t Stay Attached or Feels Loose
- Symptoms: Cable easily pulls out, wiggling the connector causes signal loss, locking mechanism doesn’t engage.
- Likely Culprits & Fixes:
- Mating Connector Damage:
- Check: Inspect the female socket on the device. Look for bent/contaminated pins, damaged locking threads or latches, cracked plastic housing.
- Fix: Carefully clean damaged pins/sockets (use extreme caution!). Replace the faulty socket or module on the device if possible.
- Cable Connector Damage:
- Check: Inspect the male connector on the cable. Is the center pin bent or damaged? Is the outer locking shell cracked? Are threads stripped? Is the latch broken?
- Fix: Replace the cable or replace the connector on the cable end (requires specialized crimping/soldering tools).
- Connector Type Mismatch:
- Check: Are you sure the connectors are supposed to fit together? (e.g., SMP vs SMPM vs MMCX look similar but are incompatible). Double-check the spec sheets for both connectors.
- Fix: Use the correct matching connector types.
Problem 4: Signal Degradation After Installation Work
- Symptoms: Signal was fine initially, but deteriorated after assembly/bending/routing. Might mimic Prob 1 or 2.
- Likely Culprits & Fixes:
- Exceeded Bend Radius:
- Check: Did you bend the micro-coax too tightly around a corner or into a connector? Micro-coax has a strict minimum bend radius (e.g., often 4-5x cable diameter). Check for sharp kinks.
- Fix: Replace kinked section/cable. Reroute the cable ensuring gentle, sweeping bends. Use cable strain relief boots where cables enter connectors. Respect the bend radius spec!
- Excessive Flexing/Strain:
- Check: Is the cable rigidly clamped just behind the connector, or is it unsupported? Does it move constantly during operation? Is there excessive pulling force on the connector?
- Fix: Secure the cable with low-pressure strain reliefs/clamps a short distance behind the connector (1-2 inches is common). Allow a gentle service loop for movement; don’t pull tight. Avoid flexing at the connector junction.
- Internal Damage During Routing:
- Check: Did the cable get pinched under a cover, twisted during installation, or pulled through a rough grommet? Look for subtle crushing points along the jacket.
- Fix: Replace the cable. Take care during future installations – route gently, avoid pinch points, use smooth grommets.
Problem 5: Suspected Grounding Issues
- Symptoms: Hum bars in video (AC hum), distorted audio, erratic data, possible equipment damage, electric shocks. May coincide with shielding problems (Prob 2).
- Likely Culprits & Fixes:
- Poor Ground Continuity: The shield is supposed to provide an electrical ground path.
- Check: Use a multimeter to measure continuity (low resistance, near 0 Ohms) between the connector shell/shield braid at one end of the cable and the shell/shield braid at the other end. Also check continuity from connector shell to the chassis ground on each connected device.
- Fix: Correct shield termination at connectors. Ensure devices are properly grounded themselves (chassis ground).
- Ground Loops: Multiple ground paths causing interference.
- Check: Do problems arise when connecting two mains-powered devices? Temporarily power one device from batteries if possible to isolate.
- Fix: Use ground loop isolators (for analog signals), ensure all devices plug into the same power circuit/outlet strip, or try lifting the ground connection (shield disconnect) at one end (only if safe and permitted by design/specification).
Essential Tools for Troubleshooting Micro-Coax:
- Magnifying Glass / Microscope: Essential for inspecting tiny pins and contacts.
- Multimeter: Checking continuity, shield grounding, and basic device power.
- Known-Good Cable: The fastest way to determine if the cable is the problem.
- Electronic Contact Cleaner & Soft Brushes: For de-oxidizing contacts.
- Fine-Point Tweezers/Pliers: Carefully fixing minor bent pins.
- Basic Cable Tester (TDR preferred): Ideal for finding breaks/impedance issues (e.g., simple continuity testers are minimal, TDR like Fluke Microscanner gives distance to fault).
Safety First: Always disconnect power from the equipment before connecting, disconnecting, or inspecting micro-coaxial cables. Discharge any static electricity from yourself before handling sensitive electronics.