Soldering micro-coaxial cables – those tiny cables used for high-frequency signals in devices like smartphones, cameras, and RF equipment – can be intimidating. Their small size and delicate structure demand precision and the right approach. If you’ve ever struggled with broken signals, shorts, or messy joints when working with micro-coax, this guide is for you. We’ll break down the essential tools and step-by-step techniques to help you achieve clean, reliable solder connections every time.
Why Micro-Coaxial Soldering is Tricky (And Why It Matters)
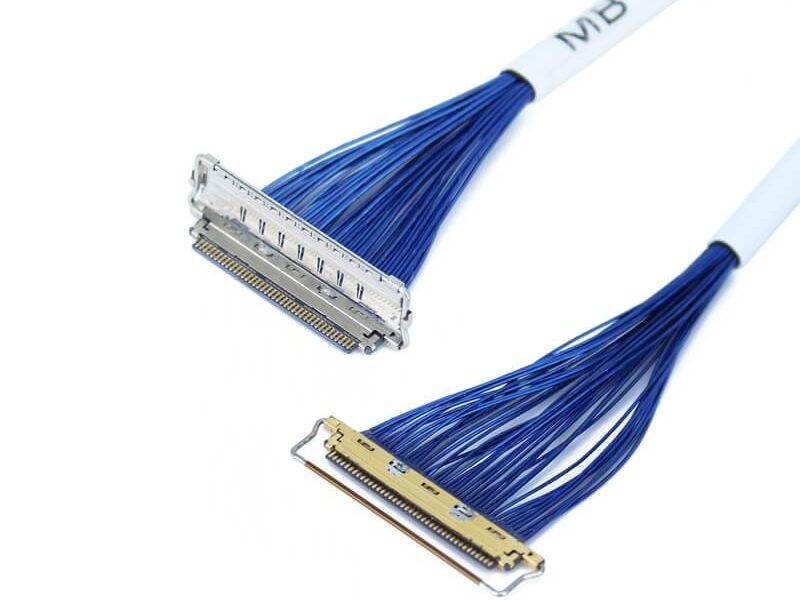
Micro-coaxial cables typically have:
- A thin center conductor (often copper-clad steel or bare copper).
- A dielectric insulator surrounding it.
- A braided or foil shield for signal protection and grounding.
- A thin outer jacket.
The challenge lies in:
- Size: Components are extremely small, requiring fine motor skills and magnification.
- Heat Sensitivity: Excessive heat can melt the dielectric or the outer jacket, ruining the cable.
- Shield Handling: Connecting the shield effectively without causing shorts to the center conductor is crucial.
- Impedance: Poor soldering can disrupt the cable’s characteristic impedance (often 50 or 75 ohms), leading to signal reflection and loss.
A bad solder joint means unreliable connections, signal degradation, noise, or complete failure. Getting it right ensures optimal performance for your sensitive electronics.
Essential Tools for Micro-Coaxial Soldering
You can’t tackle micro-coax with a basic 40W soldering iron and thick solder. Here’s what you really need:
- Precision Soldering Iron:
- Low Wattage (15W-30W): Crucial to avoid overheating. Temperature control is highly recommended.
- Fine Tip: A conical or chisel tip around 0.5mm – 1.5mm wide is ideal. Replaceable tips are a plus.
- ESD Safe: Protects sensitive components from static discharge.
- High-Quality Solder:
- Fine Diameter: Use solder wire between 0.3mm and 0.8mm diameter. 0.5mm is a common sweet spot.
- Flux Core: Essential for good wetting and flow, especially on small surfaces. Rosin core (RMA) is common and effective.
- Lead-Based (Sn63/Pb37) or Lead-Free (SAC305): Lead-based flows easier at lower temperatures, which can be advantageous for micro-work. Lead-free requires slightly higher temps but is RoHS compliant. Choose based on your requirements and local regulations.
- Flux (Additional):
- Liquid Flux (No-Clean or Rosin): Applying extra flux before soldering significantly improves flow, reduces oxidation, and makes the job easier. Use a flux pen or a small brush for precise application. No-clean flux is generally preferred unless you can thoroughly clean the area afterward.
- Magnification:
- Helping Hands with Magnifier: Holds the cable and connector steady while providing essential magnification.
- Head-Mounted Magnifier (Loupe): Offers hands-free magnification and better depth perception.
- Microscope: Ideal for the smallest micro-coax work (e.g., < 1mm diameter cables), providing the highest level of detail.
- Wire Stripping Tools:
- Precision Micro-Coax Stripper: The best option. Tools specifically designed for micro-coax have adjustable blades to precisely cut the jacket and dielectric to different depths without nicking the center conductor or shield. (e.g., models from Jonard, IWISS, or similar).
- Sharp Craft Knife / Scalpel: Requires extreme care and practice. Use a very sharp blade (e.g., #11 X-Acto blade) and gently score around the cable layers, rotating it, to avoid cutting the inner conductors. Not recommended for beginners or frequent use.
- Thermal Strippers: Use controlled heat to melt the insulation. Can be effective but require practice to avoid damaging the dielectric.
- Tweezers:
- Fine Point, Non-Magnetic: Essential for handling tiny connectors, positioning wires, and managing the delicate shield braid. ESD-safe tweezers are recommended.
- Solder Wick / Desoldering Braid:
- Fine Width (1.5mm – 2.5mm): For cleaning up mistakes or removing excess solder. Essential for rework.
- Isopropyl Alcohol (IPA) 90%+ and Swabs/Brushes:
- For cleaning flux residue after soldering, especially if using non-no-clean flux. Ensures no conductive residue remains.
- Third Hand / Helping Hands: Holds the cable and connector securely and steadily during the delicate soldering process.
Step-by-Step Micro-Coaxial Soldering Technique
Follow these steps carefully for the best results:
- Preparation is Key:
- Clean Your Iron Tip: Ensure the tip is clean and properly tinned before starting.
- Secure Components: Use helping hands to firmly hold both the micro-coax cable and the connector/PCB pad you are soldering to. Position them under magnification.
- Strip the Micro-Coax Cable:
- Measure Carefully: Determine the required strip lengths for the center conductor and shield based on your connector/pad. Usually, the center conductor needs slightly more exposure than the shield connection point.
- Strip the Outer Jacket: Using your precision stripper or scalpel, remove only the outer jacket to expose the shield braid/foil. Be careful not to cut the braid strands. Strip length = length needed for shield connection + a small margin.
- Fold Back/Push Back the Shield: Gently fold the braided shield back over the remaining jacket. If it’s foil, you might need to carefully push it back. This exposes the dielectric.
- Strip the Dielectric: Carefully strip off the dielectric insulator to expose the center conductor. Strip length = length needed for center conductor connection + a small margin. CRITICAL: Avoid nicking or scoring the center conductor itself. Any damage here weakens it significantly.
- Trim Center Conductor (If Needed): Trim the center conductor to the exact required length using fine wire cutters.
- Prepare the Shield:
- Tin the Shield (Optional but Recommended): Apply a small amount of flux to the exposed shield braid. Using your fine-tip iron and thin solder, carefully “tin” the braid – apply just enough solder to bind the strands together into a solid, manageable mass. Avoid large blobs. For foil shields, tinning is often essential to make a solderable connection.
- Tin the Center Conductor:
- Apply a tiny amount of flux to the exposed center conductor tip.
- Briefly touch the soldering iron tip (with a small amount of solder on it) to the conductor. The solder should flow smoothly and coat the conductor thinly. Avoid a large ball of solder.
- Solder the Center Conductor:
- Position the tinned center conductor onto its pad or connector pin.
- Apply a tiny bit of flux to the joint area.
- Briefly touch the soldering iron tip (with a small amount of fresh solder) to the pad/pin and the conductor simultaneously. The existing solder should melt quickly, forming a clean joint. Remove the iron immediately. The joint should be shiny and concave (not a blob).
- Solder the Shield:
- Position the prepared (tinned) shield over its designated ground pad, ring, or connector body.
- Apply flux to the connection area.
- Use the soldering iron to heat the ground point (pad/ring/body), then gently touch the solder wire to the heated ground point, allowing solder to flow onto it.
- Now, bring the tinned shield into contact with the molten solder on the ground point. Apply heat briefly to the joint area to ensure good flow and bonding. The goal is a solid electrical connection without excessive solder bridging to the center conductor. Be extra vigilant for shorts!
- Inspect and Clean:
- Visually Inspect: Under magnification, carefully check both solder joints.
- Center Conductor: Should be securely attached, shiny, not bridged to the shield.
- Shield: Should be well-bonded to the ground point. Ensure no stray shield strands are touching the center conductor or its pad.
- Check for Shorts: Use a multimeter in continuity/beep mode to check there is no connection (short) between the center conductor and the shield connection point.
- Clean: If using flux that requires cleaning, use IPA and a swab or brush to gently remove residue. Allow to dry completely.
Common Pitfalls & How to Avoid Them
- Overheating: Melts dielectric/jacket. Fix: Use lower temp (270-300°C / 520-570°F is often a good starting point), fine tip, work quickly.
- Nicking the Center Conductor: Weakens wire, causes breakage. Fix: Use sharp tools correctly, practice stripping technique, consider dedicated micro-coax stripper.
- Shield Shorting to Center Conductor: Causes signal failure. Fix: Fold shield back cleanly, tin carefully, solder shield after center conductor, visually inspect, use multimeter to check.
- Cold Solder Joints: Weak, unreliable connection. Fix: Use adequate flux, ensure surfaces are clean and pre-tinned, apply enough heat for proper flow.
- Excessive Solder: Blobs can cause shorts or stress. Fix: Use thin solder, apply sparingly, use solder wick to remove excess.
- Insufficient Shield Connection: Poor grounding, noise. Fix: Ensure shield is well-tinned and makes solid contact with the ground point.
Best Practices for Success
- Practice First: Sacrifice an old cable to practice stripping and soldering before working on a critical project.
- Work Clean: Keep your tools and work area clean. Contamination leads to poor solder joints.
- Use Adequate Flux: Flux is your friend! It makes soldering easier and improves joint quality.
- Patience is a Virtue: Rushing leads to mistakes. Take your time, especially during stripping and positioning.
- Invest in Good Tools: A precision iron and proper micro-coax stripper make a huge difference.